restAssured를 이용한 restDocs 와 OAS
들어가며
요즘카페 팀 프로젝트를 진행하면서 API 명세서는 노션을 통해 관리하고 있었다.
단순하게 노션을 이용하니 최신화, 오타 등 휴먼에러들이 많이 발생하였고 API 문서화 툴을 사용해서 작업하기로 하였다.
가장 도움이 많이 되었던 것은 공식문서이다.
Spring REST Docs
Document RESTful services by combining hand-written documentation with auto-generated snippets produced with Spring MVC Test or WebTestClient.
docs.spring.io
API 문서화 도구
도구로써 RestDocs와 Swagger를 고민하였다.
- Swagger
- 러닝커브가 적고, UI가 이쁘다.
- 프로덕션 코드에 로직이 추가된다.
- RestDocs
- 프로덕션 코드에 영향이 없다. 테스트 코드가 성공해야 문서 작성이 가능하다.
- 테스트 코드를 작성해야한다. UI가 안이쁘다.
이 둘을 고민하였는데 둘 모두의 장단점을 가져갈 수 있는
OpenAPI Specification(이하 OAS)를 이용한 Swagger와 Spring REST Docs 장점을 가져가기로 하였다.
OAS
RESTful API 스펙에 대한 표준으로서 활용되고 있다.
백엔드 API 문서를 명세하는 형식의 표준을 제공하는 것이 OAS라고 할 수 있다.
일반적으로 API 명세를 작성한다면 다양한 형식이 나올 수 있는데, 이를 JSON SCHEME라는 타입으로 통일화 해서 사용하는 것이다.
개발
우리 ‘요즘카페’ 팀은 이러한 도구를 사용하고 있다.
- java 17
- Spring boot 3
- gradle-8.1.1
- intellij idea
Gradle 추가
plugin은 특정 빌드과정에 필요한 기본정보를 포함하고, 필요에 따라 정보를 수정하여 목적에 맞게 사용할 수 있다.
restdocs-api-spec 최신 버전 플러그인을 추가하였다.
plugins {
    id 'com.epages.restdocs-api-spec' version '0.18.2'
}
restassured를 수행해 restdocs를 발행한다.
restdocs를 이용하여 restassured 테스트를 진행하며 API의 정보를 adoc으로 발행한다.
이를 gradle 의존성에 추가하였다.
dependencies {
		testImplementation 'io.rest-assured:rest-assured:5.3.1'
		//Rest Docs
    testImplementation 'org.springframework.restdocs:spring-restdocs-restassured'
}
테스트 코드
필터에 문서 설정 필터를 추가한다.
필터는 API 문서를 생성하고 관리하는 역할을 수행하며, 테스트 코드와 함께 사용하여 문서화를 도와준다.
스프링의 필터와는 다른 개념이다.
protected RequestSpecification spec;

@BeforeEach
void setUp(RestDocumentationContextProvider restDocumentation) {
    RestAssured.port = port;
    this.spec = new RequestSpecBuilder().addFilter(documentationConfiguration(restDocumentation))
            .build();
}

@Test
@DisplayName("id로 멤버 조회")
void findById() {
    //given
    final Member member = memberRepository.save(new Member("12345", "오션", "오션.image"));
    final MemberResponse expected = MemberResponse.from(member);

    //when
    final MemberResponse response = RestAssured.given(spec).log().all()
            .filter(document("멤버 조회",
                    pathParameters(
                            parameterWithName("memberId").description("멤버 ID")
                    ), responseFields(
                            fieldWithPath("id").description("멤버 아이디"),
                            fieldWithPath("name").description("멤버 이름"),
                            fieldWithPath("imageUrl").description("멤버 사진")
                    )
            ))
            .when()
            .get("/members/{memberId}", member.getId())
            .then()
            .extract().response().as(MemberResponse.class);

    //then
    assertThat(response).isEqualTo(expected);
}
필터에 documentationConfiguration 을 추가하여 request, response를 필터에서 잡고 확인할 수 있도록 한다.
RestAssured 의 given, when, then 메서드를 사용해서 테스트를 진행한다. filter 메서드에 RestDocs가 문서를 만들수 있도록 명시한다.
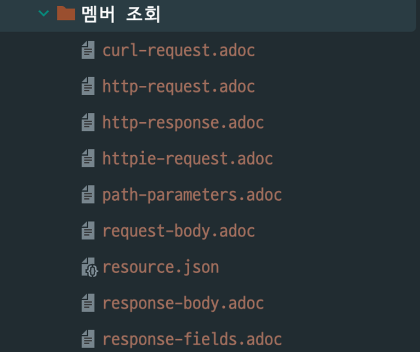
위의 코드에서는 멤버 조회 라는 문서를 만들고, pathParameter로 들어가는 값, responseFields 값을 추가한다. 이를 통해서 테스트 수행 시 문제가 발생했는지, 수정이 되었는지 여부를 판단할 수 있다.
adoc → openapi3.yaml 파일로 변환
우리는 adoc 파일을 openapi 타입에 맞게 변환을 진행해야한다.
처음에는 엄청 찾아봤지만 자체적으로 변환하는 로직은 없었다. 외부 라이브러리가 존재했는데 com.epages:restdocs-api-spec-restassured 이다. 스타가 300개에 불과해서 사용여부에 대한 고민을 많이 진행했지만 코드를 분석해보니 단순하게 adoc → yaml으로 변환하는 로직이라 사용해도 상관없을 것 같아 사용하게 되었다.
ext {
    snippetsDir = file('build/generated-snippets')
}
우리는 restassured만 사용하기 때문에 위의 것만 추가하였다.
dependencies {
		testImplementation 'com.epages:restdocs-api-spec-restassured:0.18.2'
}
하지만 계속해서 사용하고자 할 때 cannot access com.epages.restdocs.apispec.RestDocumentationWrapper가 발생했다.

이런 문제가 계속해서 발생했다.
아무리 해도 안되었는데 . . .
com.epages:restdocs-api-spec-mockmvc mockMvc를 사용하지 않음에도 이것을 추가시켜주어야했다.!!
❗❗❗❗❗❗❗❗❗❗❗❗❗❗❗❗❗❗❗❗❗❗❗❗❗❗❗❗❗❗❗❗❗❗❗❗
dependencies{
		testImplementation 'com.epages:restdocs-api-spec-restassured:0.18.2'
		testImplementation 'com.epages:restdocs-api-spec-mockmvc:0.18.2'
}
이렇게 구성하지 않으면 작동하지 않았다.. restassured와 mockmvc 패키지간 의존이 있어 이렇게 구성되는 것 같기도 하다.
오픈소스의 단점이라고 생각했다 . .
최신 기술인 openapi3 output format을 만들고 설정하였다.
Gradle에서 OpenAPI 3 문서를 생성하는 도구인 **springdoc-openapi-gradle-plugin**의 설정 블록이다.
OpenAPI 문서 생성에 관련된 정보를 지정하기 위해 사용되며 이 블록을 사용하여 OpenAPI 문서의 제목, 설명, 버전 등을 설정할 수 있다. 요청을 보낼 서버 URL 및 문서의 저장 형식을 지정할 수 있다.
openapi3 {
    server = '<http://localhost:8080>' // 요청 보낼 서버 url
    title = 'USER-API' // 제목
    description = '사용자 리소스 API 입니다.' // 설명
    version = '0.1.0' // 버전
    format = 'yaml' // openapi 저장 형식
}
테스트 결과로 생성된 스니펫들을 저장할 디렉토리를 **snippetsDir**로 지정하였다.
test {
    useJUnitPlatform()
    outputs.dir snippetsDir
}
그 후
./gradlew openap3

이런식으로 openapi3 로 빌드를 완료하게 된다.
openapi3 결과 확인
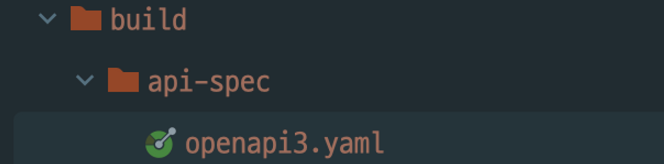
빌드 디렉토리에 openapi3.yaml 파일이 생성된다.
openapi: 3.0.1
info:
  title: USER-API
  description: 사용자 리소스 API 입니다.
  version: 0.1.0
servers:
- url: <http://localhost:8080>
tags: []
paths:
  /members/{memberId}:
    get:
      tags:
      - members
      operationId: 멤버 조회
      parameters:
      - name: memberId
        in: path
        description: 멤버 ID
        required: true
        schema:
          type: string
      responses:
        "200":
          description: "200"
          content:
            application/json:
              schema:
                $ref: '#/components/schemas/members-memberId-1619908362'
              examples:
                멤버 조회:
                  value: "{\\"id\\":\\"12413\\",\\"name\\":\\"연어\\",\\"imageUrl\\":\\"image\\"\\
                    }"
components:
  schemas:
    members-memberId-1619908362:
      type: object
      properties:
        imageUrl:
          type: string
          description: 멤버 사진
        name:
          type: string
          description: 멤버 이름
        id:
          type: string
          description: 멤버 아이디
이런식으로 yaml파일이 생성된다.
이 yaml 파일을
<!doctype html>
<html lang="ko">
  <head>
    <meta charset="utf-8">
    <meta name="viewport" content="width=device-width, initial-scale=1, shrink-to-fit=no">
    <title>Elements in HTML</title>
    <!-- Embed elements Elements via Web Component -->
    <script src="https://unpkg.com/@stoplight/elements/web-components.min.js"></script>
    <link rel="stylesheet" href="https://unpkg.com/@stoplight/elements/styles.min.css">
  </head>
  <body>
    <elements-api
      apiDescriptionUrl="openapi.yaml"
      router="hash"
      layout="sidebar"
    />
  </body>
</html>
feat. 솔로스타
이를 통해 출력하게 하였다.
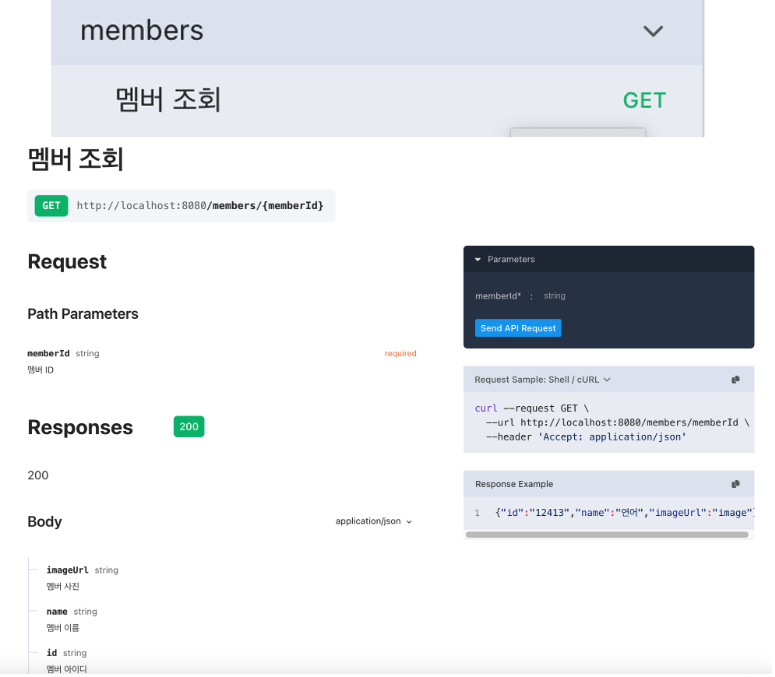
이런식으로 생성된다.
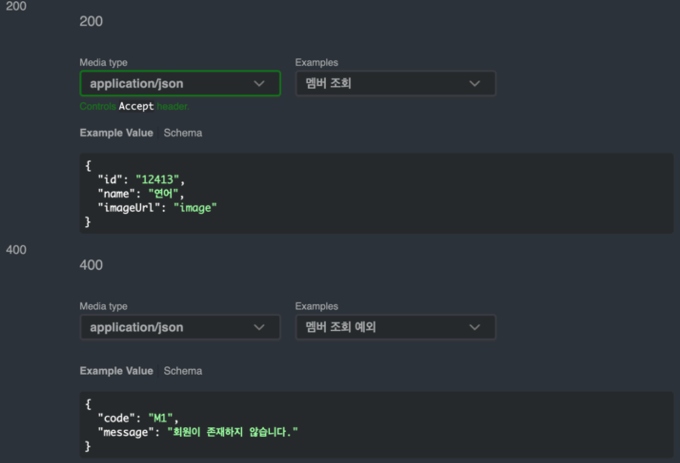
여러개의 response 반환
멤버 조회에 대해서 여러개의 반환값을 갖고 싶었다.
단순하게 성공 200 테스트 뿐 아니라 실패 400에 대해서도 작성을 하고 싶었는데
@Test
    @DisplayName("id로 멤버 조회")
    void findById_fail() {
        //given
        //when
        RestAssured.given(spec).log().all()
                .filter(document("멤버 조회 예외",
                        pathParameters(
                                parameterWithName("memberId").description("멤버 ID").attributes(key("required").value(true))
                        ), responseFields(
                                fieldWithPath("code").description("에러 코드"),
                                fieldWithPath("message").description("에러 메세지")
                        )
                ))
                .when()
                .get("/members/{memberId}", 1L)
                .then()
                .statusCode(HttpStatus.BAD_REQUEST.value());
				//then
    }
이런식으로 그냥 작성을 해주어도 응답이 합쳐지는 것 같다.
나가며
공식문서를 놓치고 있었는데 크루인 연어 덕분에 잘 진행할 수 있었다..
공식문서 짱이다.